How to power your Performance Max VLA campaign with a VIN IQ Feed
Important Note: When using a VIN IQ Feed, we strongly recommend creating a brand-new Performance Max campaign by following the guide below. DO NOT link the VIN IQ feed into a previously created campaign. The VIN IQ integration with Merchant Center is specifically designed to generate a feed tailored for Vehicle Listing Ads.
If you have any questions about these instructions please contact “support@viniq.io”.
A. Create a New Performance Max Campaign
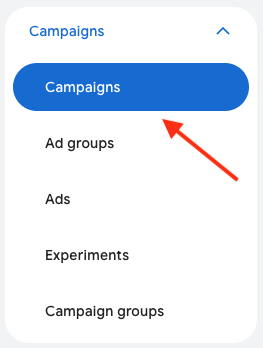
1. In your Google Ads account, select Campaigns and navigate to the Campaigns tab.
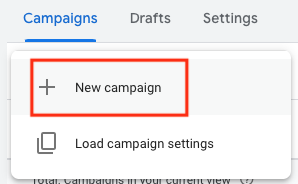
2. Click the "+" button to create a campaign.
3. Select New campaign.
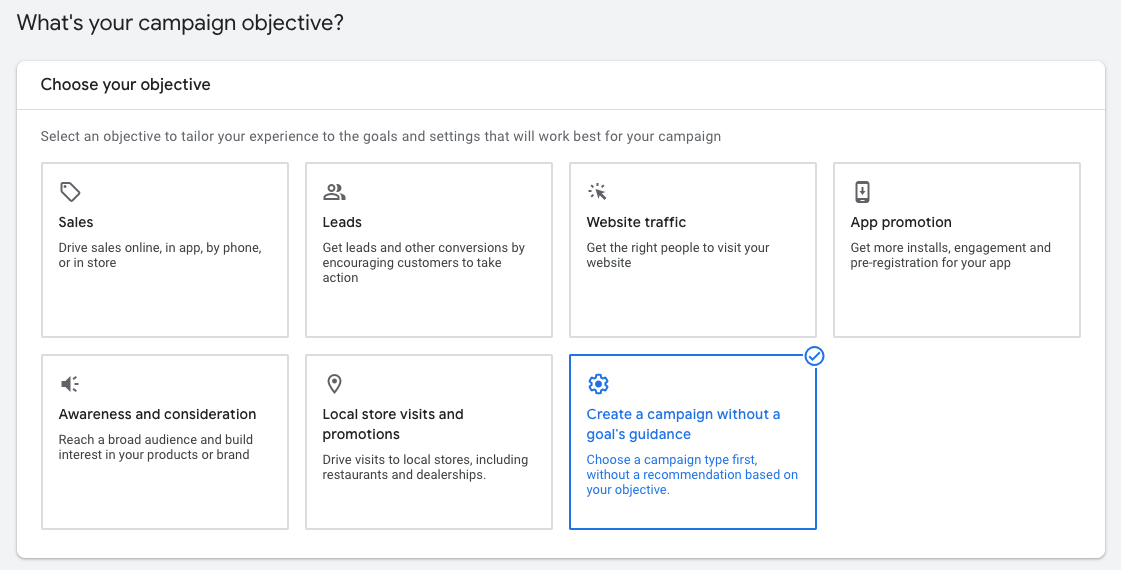
4. Next, select Create a campaign without a goal’s guidance as the objective.
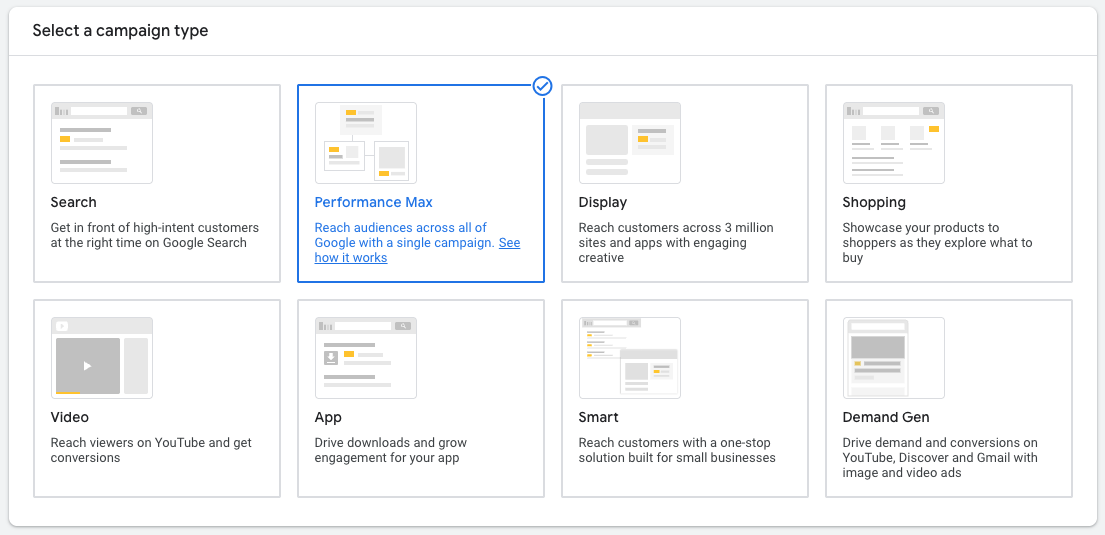
5. Select Performance Max as the campaign type.
6. Under conversion goals you can adjust your conversions to your preference or scroll past this section.
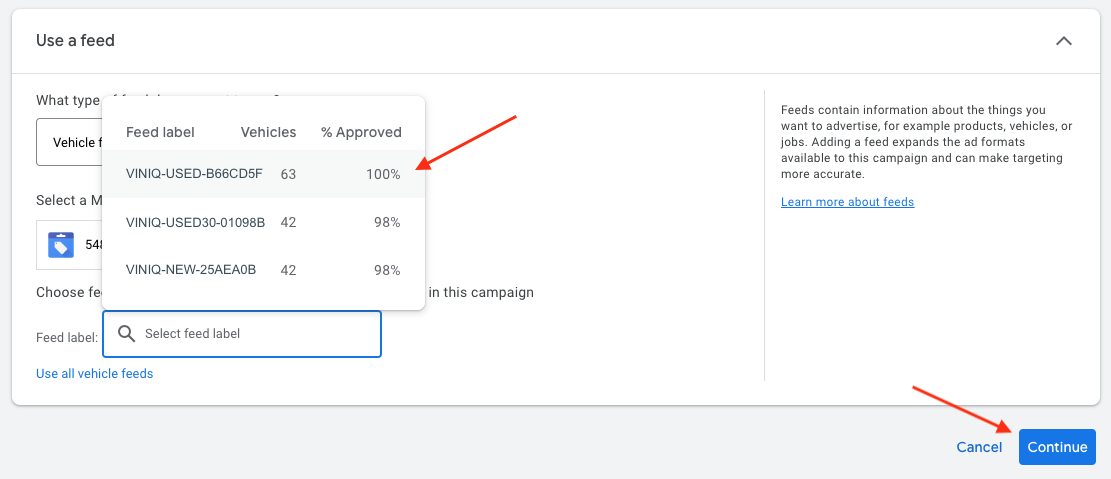
7. In the Use a feed section, select Vehicle feed as the feed type. Your Merchant Center account should be already selected.
You will need your Merchant Center account linked to your Google Ads account for this configuration option to show up.
8. Click on Select specific feeds.
9. Choose the corresponding VIN IQ Feed to the campaign you wish to create. Click Continue.
10. Next, name your campaign (e.g. VIN IQ - VLA - New). Click Continue.
B. Set Up the Campaign
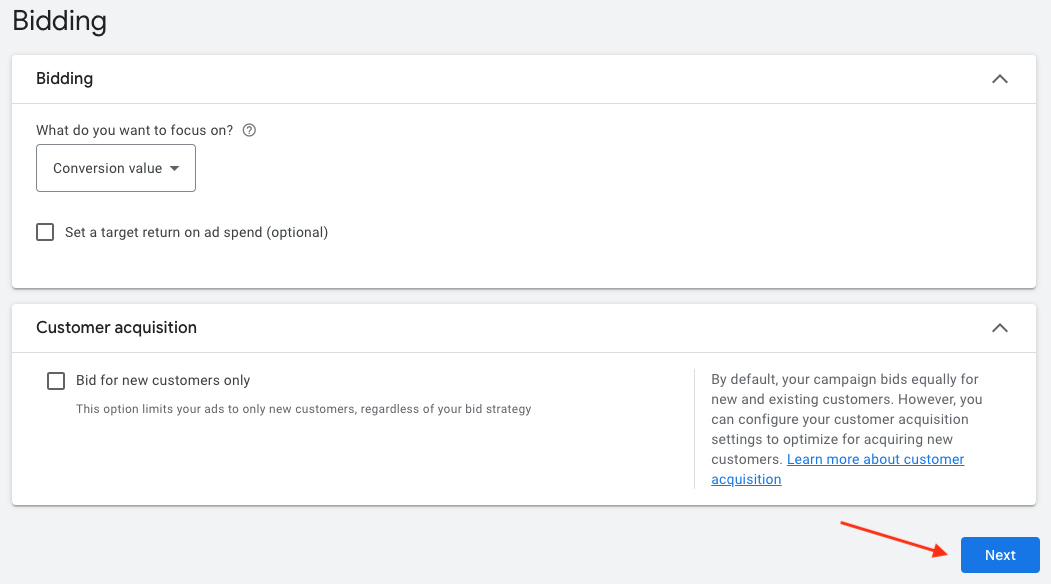
11. In the Bidding section, you can select Conversion or Conversion value as desired. Leave the box under Customer acquisition unchecked since we want to target all customers. Click Next.
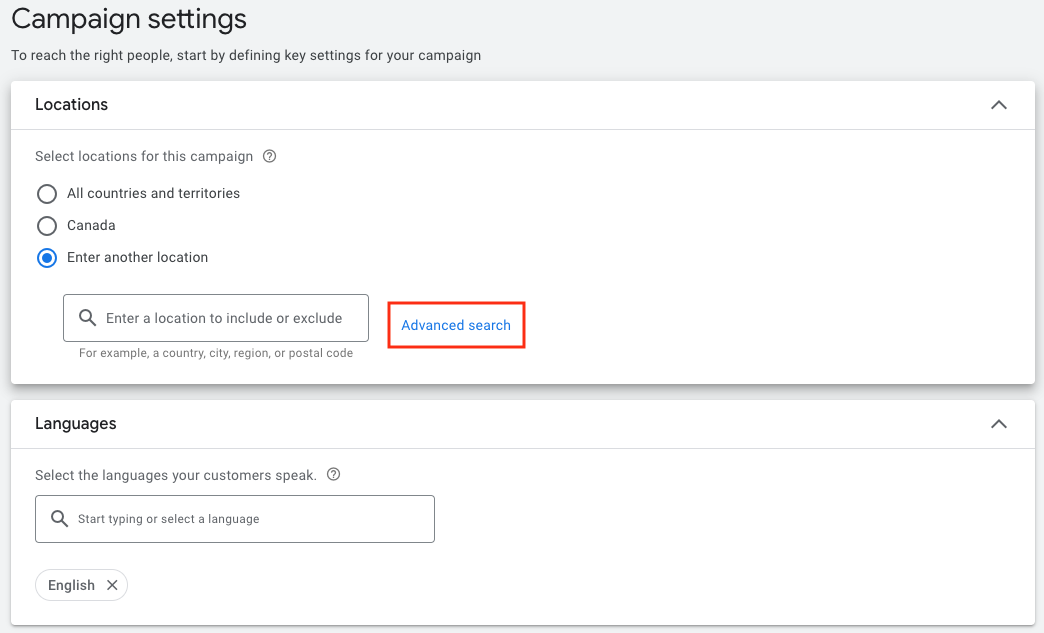
12. In the next section, select the Locations and Languages as suited for your campaign. You can enter a specific location under the Advanced search option.
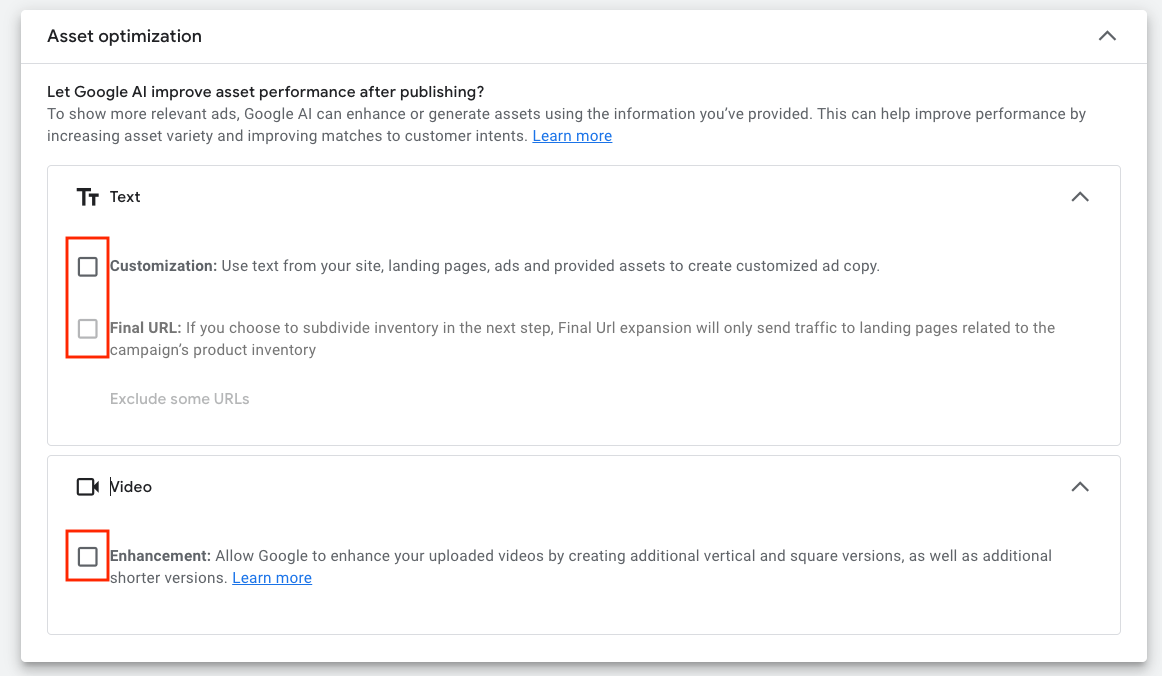
13. Now, click on the arrow beside Asset optimization and click the arrows to further expand the menu for Text and Video.
Here uncheck all boxes.
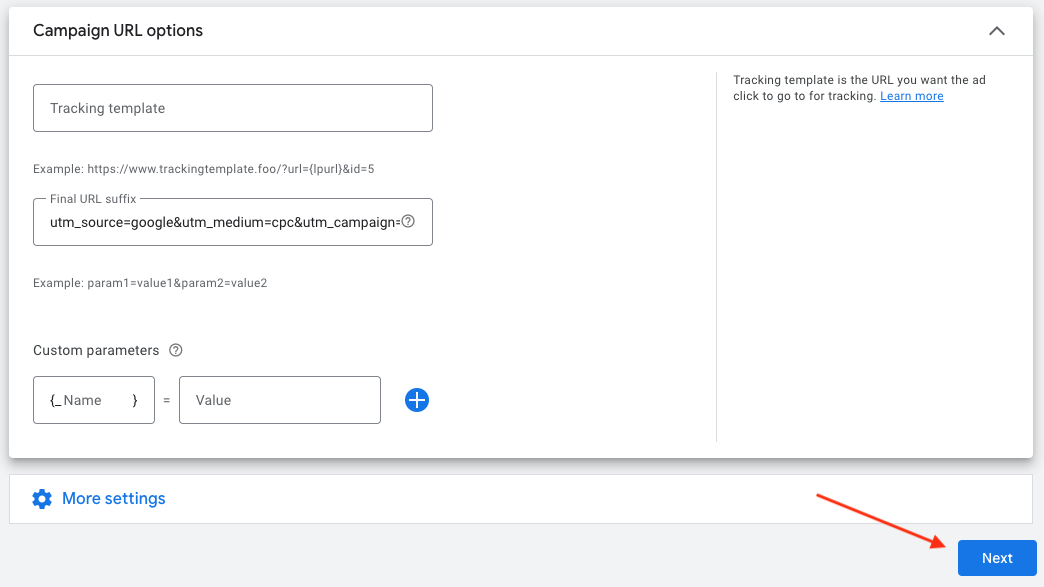
14. Now, click on More settings and select Campaign URL options.
You should tag your campaign with the proper UTM parameters so it can be easily identified by VIN IQ and Google Analytics (GA).
In the Final URL suffix field you can enter the desired UTM values for Source, Medium, Campaign etc. While you can enter any values you wish as UTM tracking parameters, typical examples will be descriptive of the source (Google) and the medium (cpc).
One suggestion for the utm_campaign parameter is to include an indication of the campaign type and specify that it is being populated by the VIN IQ feed. A simple example of this is as follows:
utm_source=google&utm_medium=cpc&utm_campaign=vla-new-viniq
Click Next once you’re done.
C. Asset Generation
15. For best results, we recommend you skip the Asset generation step by clicking on the Skip button at the bottom right corner.
Most assets are not compatible with Vehicle Listing Ads and can drive clicks away from the vehicle detail page (VDP).
D. Asset Group
16. Create your Asset group name as desired, using the default name will suffice.
17. Under Listing groups click in the edit pencil beside All products.
18. Select Use a selection of products.
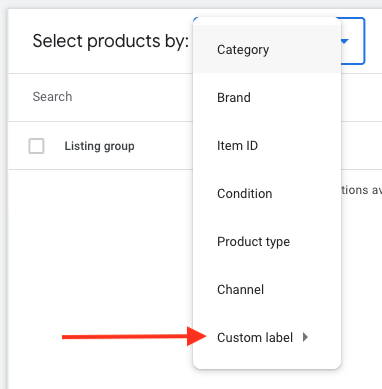
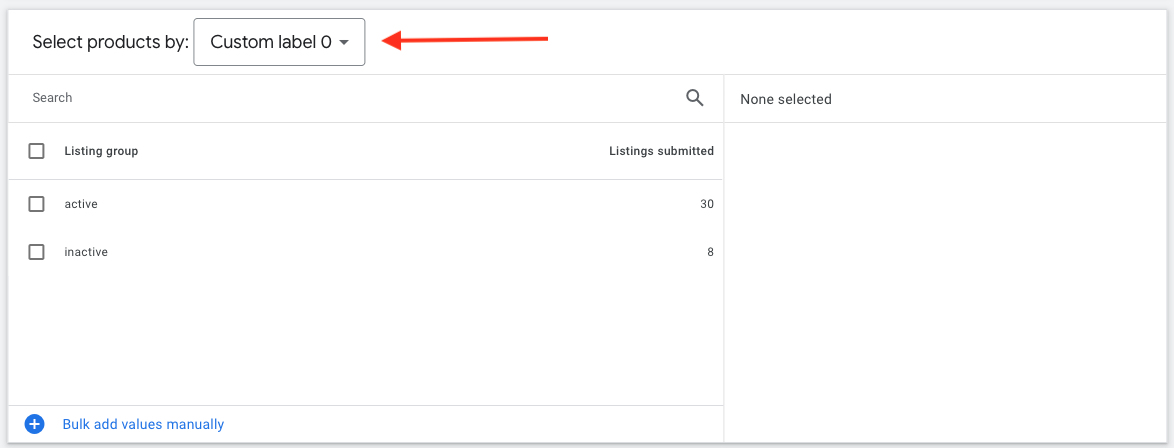
19. Under Select products by choose Custom Label and select Custom label 0 (zero).
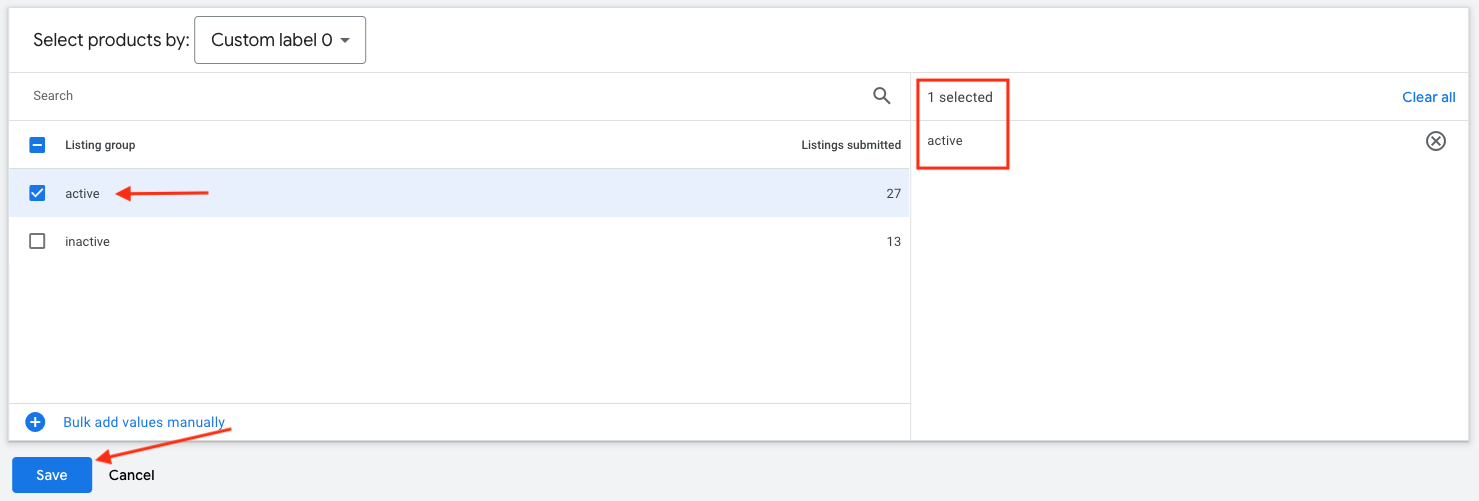
20. Select the active listing group item so it will show on the right side panel and click on Save.
21. In the Assets section, we advise to only provide your Final URL.
For best results we recommend not using any additional assets at this configuration step.
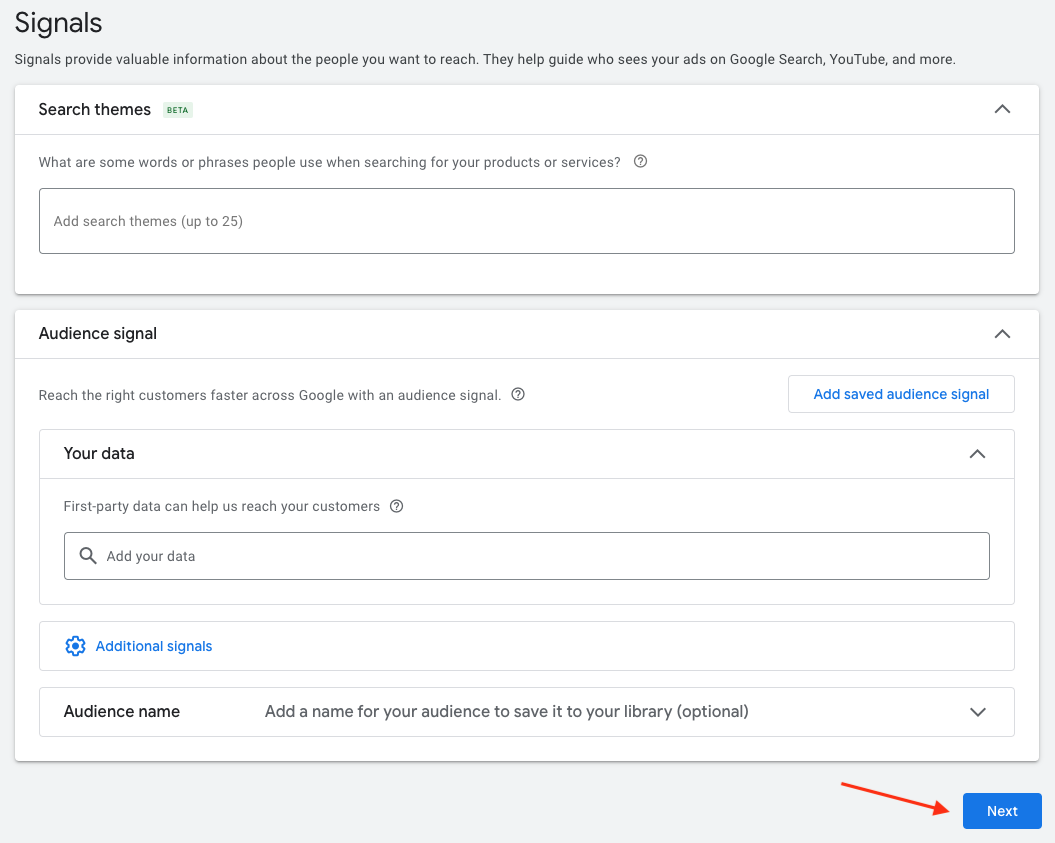
22. In the Signals section, select the configurations as suited for your campaign or scroll past this section. Click Next to proceed.
E. Budget
23. Set your budget as desired and click Next.
F. Summary
24. Review your campaign configuration and select Publish campaign.
25. You have completed the steps to launch your VLA campaign. Contact “support@viniq.io” if you have any questions.
G. (Optional) Review listing group configuration
The labels under the listing groups must be correctly configured in order for the VIN IQ feed to properly work with the Performance Max campaign that was just created. As a best practice, please check this configuration once the campaign has been published.
26. Go to the Campaign option on the left side menu.
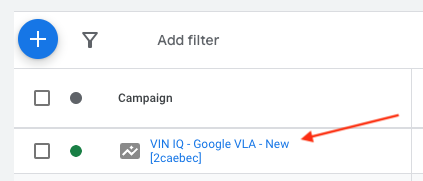
27. Now select the name of the campaign that was just created to filter out all other campaigns.
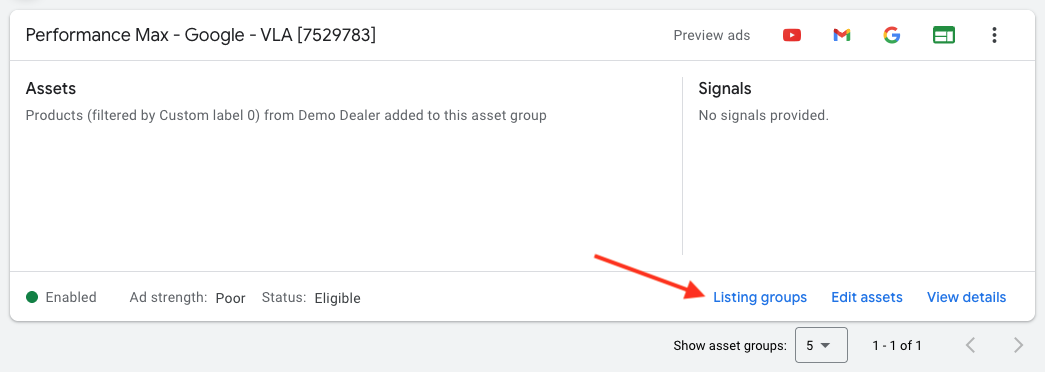
28. Go to Asset groups.
29. You should see that the products are filtered by the Custom label 0 (zero).
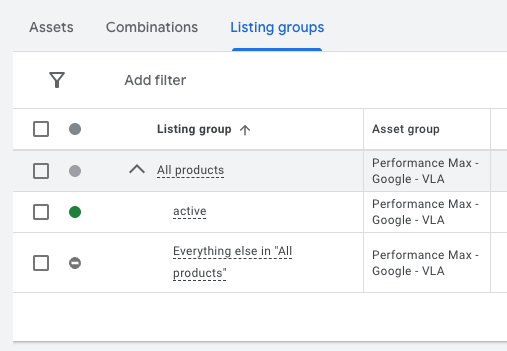
30. If you click on Listing groups you will see the “active” label is included, highlighted in green, and “Everything else in 'All Products'“ is excluded.
